
In this blog, We are creating the CRUD In ASP.NET MVC using code first database and razor syntax. MVC stands for Model View Controller. It’s a design pattern that separates the business logic from the display logic and the data. In a nutshell, it’s a pattern for designing online apps.
We’ll look at how to manually write code for each step in this application. As a result, CRUD denotes (Create, Read, Update, Delete).
- Let’s create an ‘MVC’ application named ‘CRUDMVCCF’.
- Change Authentication check to ‘No Authentication’.
- ‘MVC Template’ with ‘MVC References’.
- First of all, let’s set the ‘Employee’ model class to our project.
Our model class is transformed into a database table via Entity Framework. Assume you’re building a database and create an “Employee” model.
public class Employee
{

    [Key]
    public int EmpId { get; set; }

    public string EmpName { get; set; }

    public float Age { get; set; }

    public DateTime DateOfJoining { get; set; }

    public int DeptId { get; set; }

    public Department Department { get; set; }

}
Also, We can add the “Department ” Model for the foreign key concept to understand.
public class Department
   {

       public Department()
       {
           Employees = new HashSet<Employee>(); //Make Foreign key
       }

       [Key]
       public int DeptId { get; set; }

       public string DeptName { get; set; }

       public ICollection<Employee> Employees { get; set; }
   }
Now we need to create our bridge class, also known as a ‘context class,’ to connect our model to the database.
- Add the context class ‘DatabaseContext’ to the Models folder by right-clicking on it.
- Now we’ll inherit this class from ‘DbContext,’ but Visual Studio doesn’t have a reference to this base class.
As a result, we’ll have to manually add the Entity Framework to our project. By right-clicking on your project and selecting NuGet Packages, you may manage your NuGet packages. After that, we can use DbContext to inherit our Context class.
- And create the property of our model class.
public class DataBaseContext : DbContext
{
    public DataBaseContext() : base("DefaultConnection")
    {

    }

    public DbSet<Employee> Employees { get; set; }

    public DbSet<Department> Departments { get; set; }

}
Now open the Application’s Web. config file which is at the root level. And write the connection string. These configurations files are actually in the form of XML.
We can set connection string inside the ‘configuration’ XML tag wherever we want. But we normally place connection string after ‘system. web’ XML tag.
<connectionStrings>
   <add name="DefaultConnection" connectionString="Server=SERVERNAME;Initial Catalog=CRUD_Test;Persist Security Info=False;User ID=USERNAME;Password=PASSWORD;MultipleActiveResultSets=True;Encrypt=False;TrustServerCertificate=False;Connection Timeout=30;" providerName="System.Data.SqlClient" />
 </connectionStrings>
Let me tell you one more important thing about connection string if you’ve installed a standalone SQL server in your machine then if you write only dot (.) anywhere else in the visual studio environment where you need to input SQL server name then it will ok, no need to worry about that. It will work fine.
We can put the connection string wherever we like in the ‘configuration’ XML tag. However, we usually place the connection string after the XML tag ‘system. web.’
PM> Enable-Migrations
Now it’s time to put the table together using migrations. So, write in the Package Manager Console and label the migration that you want to save these changes into your project; this way, you’ll be able to tell which changes are crucial and what the changes’ goal was later on in the project.
PM> Add-Migration AddTable //AnyNameYouWant
In our Migrations folder, a new class called ‘AddTable’ has been added, which is the script that will generate the table.
PM> Update-Database
And now we’ve successfully created our ‘Employees’ and ‘Departments’ table with foreign key and our database is ready to use.
Now, it is the time of development.
Now, add the Empty ‘EmployeesController’ into the project. Here we have by default ‘Index’ action and create the context class object.
namespace CRUDMVCCF.Controllers
{

    public class EmployeeController: Controller
    {
        private readonly DataBaseContext _context = new DataBaseContext();

        // GET: Employee
        public ActionResult Index()
        {
            List<Employee> listOfEmployee = _context.Employees.Include(x => x.Department).ToList();
            return View(listOfEmployee);
        }
    }
}
The ‘Index’ action is used to display all of the records on the screen, as we already know. So we’re retrieving all the methods and rendering them into view using LINQ. We’ll use our employee’s list in our ‘Index’ view, which we’ll provide into the view.

Now, click on the ‘Add’ Button and the view has been created. first of all, catch the list into this new ‘Index’ view.
@model IEnumerable<CRUDMVCCF.Models.Table.Employee>

@{
    ViewBag.Title = "Index";
}

<h2>Index</h2>
And now add the ‘Create’ hyperlink after the ‘Index’ heading.
<p>
    @Html.ActionLink("Create New Employee", "Create", new { area = "" }, new { @class = "btn btn-primary" })
</p>
Let’s now add the table that will be used to display the data on the screen.
<table class="table">
    <tr>
        <th> No. </th>
        <th>
            @Html.DisplayNameFor(n => n.EmpName)
        </th>
        <th>
            @Html.DisplayNameFor(n => n.Age)
        </th>
        <th>
           @Html.DisplayNameFor(n => n.DateOfJoining)
        </th>
        <th>
            @Html.DisplayNameFor(n => n.Department)
        </th>
        <th>Action</th>
    </tr>
</table>
We also understand how the foreach loop and lambda expression work. So don’t be perplexed by the way these HTML auxiliary lambda expressions function.
@foreach (var item in Model.Select((value, index) => new { index, value }))
   {
       <tr>
           <td>
               @{ var no = item.index + 1; }
               @no
           </td>
           <td>
               @Html.DisplayFor(x => item.value.EmpName)
           </td>
           <td>
               @Html.DisplayFor(modelItem => item.value.Age)
           </td>
           <td>
               @{ var dateFormate = item.value.DateOfJoining.ToString("dd-MM-yyyy"); }
               @Html.DisplayFor(modelItem => dateFormate)
           </td>
           <td>
               @Html.DisplayFor(modelItem => item.value.Department.DeptName)
           </td>
           <td>
               @Html.ActionLink("Edit", "Edit", new { id = item.value.EmpId }) |
               @Html.ActionLink("Detail", "Detail", new { id = item.value.EmpId }) |
               @Html.ActionLink("Delete", "Delete", new { id = item.value.EmpId })
           </td>
       </tr>
    }
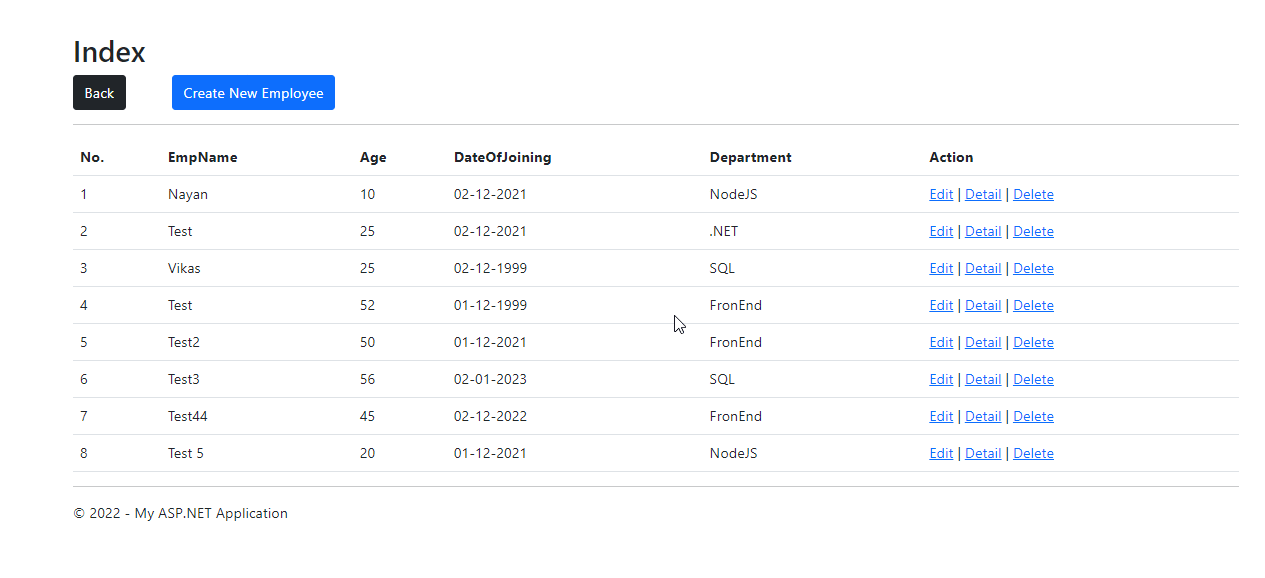
And finally, our ‘Index’ view looks like,
@model IEnumerable<CRUDMVCCF.Models.Table.Employee>
@{
    ViewBag.Title = "Index";
}
<h2>Index</h2>


<div class="row">
    <div class="col-md-1">
        @Html.ActionLink("Back", "Index", "Home", new { area = "" }, new { @class = "btn btn-dark" })
    </div>
    <div class="col-md-2">
        @Html.ActionLink("Create New Employee", "Create", new { area = "" }, new { @class = "btn btn-primary" })
    </div>
    <div class="col-md-3">
        @Html.ActionLink("Delete Multiple Employee", "DeleteRow", new { area = "" }, new { @class = "btn btn-danger" })
    </div>
</div>
<hr />
<table class="table">
    <tr>
        <th>
            No.
        </th>
        <th>
            @Html.DisplayNameFor(n => n.EmpName)
        </th>
        <th>
            @Html.DisplayNameFor(n => n.Age)
        </th>
        <th>
            @Html.DisplayNameFor(n => n.DateOfJoining)
        </th>
        <th>
            @Html.DisplayNameFor(n => n.Department)
        </th>
        <th>
            Action
        </th>
    </tr>

    @foreach (var item in Model.Select((value, index) => new { index, value }))
    {
        <tr>
            <td>
                @{ var no = item.index + 1; }
                @no
            </td>
            <td>
                @Html.DisplayFor(x => item.value.EmpName)
            </td>
            <td>
                @Html.DisplayFor(modelItem => item.value.Age)
            </td>
            <td>
                @{ var dateFormate = item.value.DateOfJoining.ToString("dd-MM-yyyy"); }
                @Html.DisplayFor(modelItem => dateFormate)
            </td>
            <td>
                @Html.DisplayFor(modelItem => item.value.Department.DeptName)
            </td>
            <td>
                @Html.ActionLink("Edit", "Edit", new { id = item.value.EmpId }) |
                @Html.ActionLink("Detail", "Detail", new { id = item.value.EmpId }) |
                @Html.ActionLink("Delete", "Delete", new { id = item.value.EmpId })
            </td>
        </tr>
     }
</table>
Create
Now is the time to Create action. As we already know that Create GET Request is all about showing the form on the screen and when a user fills in the form then it comes to the POST request of Create action.
public ActionResult Create()
{
    var departmentResponse = _context.Departments.ToList();
    List<SelectListItem> departmentList = new List<SelectListItem>();
    foreach (var dept in departmentResponse)
    {
        departmentList.Add(new SelectListItem() { Text = dept.DeptName, Value = dept.DeptId.ToString() });
    }
    ViewBag.Departments = departmentList;
    return View();
}
We don’t have to provide any information to our ‘Create’ form. Because the form provides us with information. Create an empty view for the Create action once more. Our textboxes must be bound to our class properties at this point. As a result, the header statement is used once more.
@model IEnumerable<CRUDMVCCF.Models.Table.Employee>
Let’s create the form.
Here, we should be good enough in bootstrap 4 or 5 Visual Studio by default is using bootstrap 3.
@model CRUDMVCCF.Models.Table.Employee
@{
    ViewBag.Title = "Create";
}

@using (Html.BeginForm("AddEmployee", "Employee", FormMethod.Post))
{
    <div class="from-horizontal">
        <div class="row">
            <div class="col-md-1">
                @Html.ActionLink("Back", "Index", "Employee", new { area = "" }, new { @class = "btn btn-dark" })
            </div>
            <div class="col-md-2">
                <h4> Employees</h4>
            </div>
        </div>
        <hr />
        @Html.ValidationSummary(true, "", new { @class = "text-danger" })
        <div class="from-group row mb-2">
            @Html.LabelFor(x => x.EmpName, new { @class = "control-label col-md-2" })
            <div class="col-md-10">
                @Html.TextBoxFor(x => x.EmpName, new { @class = "form-control" })
                @Html.ValidationMessageFor(x => x.EmpName, "", new { @class = "text-danger" })
            </div>
        </div>
        <div class="from-group row mb-2">
            @Html.LabelFor(x => x.Age, new { @class = "control-label col-md-2" })
            <div class="col-md-10">
                @Html.TextBoxFor(x => x.Age, new { @class = "form-control" })
                @Html.ValidationMessageFor(x => x.Age , "", new { @class = "text-danger" })
            </div>
        </div>
        <div class="from-group row mb-2">
            @Html.LabelFor(x => x.DateOfJoining, new { @class = "control-label col-md-2" })
            <div class="col-md-10">
                @Html.TextBoxFor(x => x.DateOfJoining, new { @class = "form-control" })
                @Html.ValidationMessageFor(x => x.DateOfJoining, "", new { @class = "text-danger" })
            </div>
        </div>
        <div class="from-group row mb-2">
            @Html.LabelFor(x => x.DeptId, new { @class = "control-label col-md-2" })
            <div class="col-md-10">
                @Html.DropDownList("DeptId", (List<SelectListItem>)ViewBag.Departments, new { @class = "form-select" })
            </div>
        </div>
        <div class="form-group">
            <div class="col-md-offset-2 col-md-6 text-center">
                <input type="submit" value="Create" class="btn btn-secondary" />
            </div>
        </div>
    </div>
}
Now that we know that when we fill out this form, it will be posted to the POST ‘AddEmployee’ action, we can proceed. As a result, we need to add our form data to the database in the POST action.
[HttpPost]
public ActionResult AddEmployee(Employee employee)
{
    try
    {
        if (ModelState.IsValid)
        {
            _context.Employees.Add(employee);
            _context.SaveChanges();
            return RedirectToAction("Index");
        }
    }
    catch (Exception ex)
    {

    }
    return View("~/Views/Home/Index.cshtml" , employee);
}
If the data is invalid, it indicates our ModelState is invalid, and the form data will be passed to the view again, as we did previously.
Let’s put our application to the test and see how it performs.
Allow me to provide one more critical point for you to consider. In our ‘Create.cshtml’ view, there are no HTML controls for the ‘EmployeeId’ property. And don’t get confused about the id during debugging because we submitted the form. When the record is sent to the database table, the id is actually created. And because our Id is the primary key, it cannot be null, the database automatically increments i
Edit
We’ve seen enough of the views now. Let’s concentrate on the business logic code for the time being.
public ActionResult Edit(int? id)
        {
            if (id == null)
            {
                return new HttpStatusCodeResult(HttpStatusCode.BadRequest);
            }

            var employee = _context.Employees.SingleOrDefault(e => e.EmpId == id);
            if (employee == null)
            {
                return HttpNotFound();
            }
            var departmentResponse = _context.Departments.ToList();
            List<SelectListItem> departmentList = new List<SelectListItem>();
            foreach (var dept in departmentResponse)
            {
                departmentList.Add(new SelectListItem() { Text = dept.DeptName, Value = dept.DeptId.ToString() });
            }
            ViewBag.Departments = departmentList;
            return View(employee);
        }
Look, in our programming, we’re taking a defensive stance. What parameters value is coming, whether it is null or not, to check the record against that value if it is null or not — these kinds of things are important for a good developer.
Let’s now use scaffolding to construct its view.

Now you have got this view.
Remove the HTMLml helper (AntiForgeryToken) from this section; we’ll talk about it later. Another thing is the hidden field is really very important. Here is my Final Edit View.
@model CRUDMVCCF.Models.Table.Employee

@{
    ViewBag.Title = "Edit";
}


@using (Html.BeginForm("EditEmployee", "Employee", FormMethod.Post))
{

    <div class="form-horizontal">
        <div class="row">
            <div class="col-md-1">
                @Html.ActionLink("Back", "Index", "Employee", new { area = "" }, new { @class = "btn btn-dark" })
            </div>
            <div class="col-md-2">
                <h4> Edit Employees</h4>
            </div>
        </div>
        <hr />
        @Html.ValidationSummary(true, "", new { @class = "text-danger" })
        @Html.HiddenFor(model => model.EmpId)

        <div class="from-group row mb-2">
            @Html.LabelFor(model => model.EmpName, htmlAttributes: new { @class = "control-label col-md-2" })
            <div class="col-md-10">
                @Html.EditorFor(model => model.EmpName, new { htmlAttributes = new { @class = "form-control" } })
                @Html.ValidationMessageFor(model => model.EmpName, "", new { @class = "text-danger" })
            </div>
        </div>

        <div class="from-group row mb-2">
            @Html.LabelFor(model => model.Age, htmlAttributes: new { @class = "control-label col-md-2" })
            <div class="col-md-10">
                @Html.EditorFor(model => model.Age, new { htmlAttributes = new { @class = "form-control" } })
                @Html.ValidationMessageFor(model => model.Age, "", new { @class = "text-danger" })
            </div>
        </div>

        <div class="from-group row mb-2">
            @Html.LabelFor(model => model.DateOfJoining, htmlAttributes: new { @class = "control-label col-md-2" })
            <div class="col-md-10">
                @Html.EditorFor(model => model.DateOfJoining, new { htmlAttributes = new { @Value = @Model.DateOfJoining.ToString("dd-MM-yyyy"), @class = "form-control" } })
                @Html.ValidationMessageFor(model => model.DateOfJoining, "", new { @class = "text-danger" })
            </div>
        </div>

        <div class="from-group row mb-2">
            @Html.LabelFor(model => model.DeptId, "DeptId", htmlAttributes: new { @class = "control-label col-md-2" })
            <div class="col-md-10">
                @Html.DropDownList("DeptId", (List<SelectListItem>)ViewBag.Departments, htmlAttributes: new { @class = "form-select" })
                @Html.ValidationMessageFor(model => model.DeptId, "", new { @class = "text-danger" })
            </div>
        </div>

        <div class="form-group">
            <div class="col-md-offset-2 col-md-6 text-center">
                <input type="submit" value="Save" class="btn btn-secondary" />
            </div>
        </div>
    </div>
}
Now, let’s create the post ‘EditEmployee’ action.
[HttpPost]
        public ActionResult EditEmployee(Employee employee)
        {
            try
            {
                if (ModelState.IsValid)
                {
                    _context.Entry(employee).State = EntityState.Modified;
                    _context.SaveChanges();
                    return RedirectToAction("Index", "Employee");
                }
            }
            catch (Exception ex)
            {

            }
            return View("~/Views/Home/Index.cshtml", employee);
        }
Details
We now have nothing in the details section to post the data (form) back to the server. All we need to do now is display the data on the screen. So,
public ActionResult Detail(int? id)
        {
            if (id == null)
            {
                return new HttpStatusCodeResult(HttpStatusCode.BadRequest);
            }

            var employee = _context.Employees.Include(x => x.Department).SingleOrDefault(e => e.EmpId == id);
            if (employee == null)
            {
                return HttpNotFound();
            }
            var departmentResponse = _context.Departments.ToList();
            List<SelectListItem> departmentList = new List<SelectListItem>();
            foreach (var dept in departmentResponse)
            {
                departmentList.Add(new SelectListItem() { Text = dept.DeptName, Value = dept.DeptId.ToString() });
            }
            ViewBag.Departments = departmentList;
            return View(employee);
        }
Actually, the code is quite straightforward. Now, with the help of scaffolding, add its view.
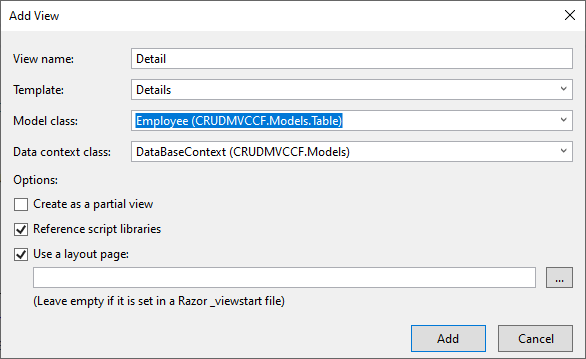
@model CRUDMVCCF.Models.Table.Employee

@{
    ViewBag.Title = "Detail";
}

<div>
    <div class="row">
        <div class="col-md-1">
            @Html.ActionLink("Back", "Index", "Employee", new { area = "" }, new { @class = "btn btn-dark" })
        </div>
        <div class="col-md-1">
            @Html.ActionLink("Edit", "Edit", new { id = Model.EmpId }, new { @class = "btn btn-dark" })
        </div>
        <div class="col-md-2">
            <h4> Employees Detail</h4>
        </div>
    </div>
    <hr />
    <dl class="dl-horizontal">
        <dt>
            @Html.DisplayNameFor(model => model.EmpName)
        </dt>

        <dd>
            @Html.DisplayFor(model => model.EmpName)
        </dd>

        <dt>
            @Html.DisplayNameFor(model => model.Age)
        </dt>

        <dd>
            @Html.DisplayFor(model => model.Age)
        </dd>

        <dt>
            @Html.DisplayNameFor(model => model.DateOfJoining)
        </dt>

        <dd>
            @{ var dateFormate = Model.DateOfJoining.ToString("dd-MM-yyyy");}
            @Html.DisplayFor(model => dateFormate)
        </dd>
        <dt>
            @Html.DisplayNameFor(model => model.Department.DeptName)
        </dt>

        <dd>
            @Html.DisplayFor(model => model.Department.DeptName)
        </dd>
    </dl>
</div>
Delete
So, let’s write the Delete Get request code.
public ActionResult Delete(int? id)
{
    if (id == null)
    {
        return new HttpStatusCodeResult(HttpStatusCode.BadRequest);
    }

    var employee = _context.Employees.Include(x => x.Department).SingleOrDefault(e => e.EmpId == id);
    if (employee == null)
    {
        return HttpNotFound();
    }
    return View(employee);
}
Now create its view. You can explore the views on your own and you should be.
@model CRUDMVCCF.Models.Table.Employee

@{
    ViewBag.Title = "Delete";
}


<div>
    <div class="row">
        <div class="col-md-1">
            @Html.ActionLink("Back", "Index", "Employee", new { area = "" }, new { @class = "btn btn-dark" })
        </div>
        <div class="col-md-10">
            <h3>Are you sure you want to delete this employee?</h3>
        </div>
    </div>
    <hr />
    <dl class="dl-horizontal">
        <dt>
            @Html.DisplayNameFor(model => model.EmpName)
        </dt>

        <dd>
            @Html.DisplayFor(model => model.EmpName)
        </dd>

        <dt>
            @Html.DisplayNameFor(model => model.Age)
        </dt>

        <dd>
            @Html.DisplayFor(model => model.Age)
        </dd>

        <dt>
            @Html.DisplayNameFor(model => model.DateOfJoining)
        </dt>

        <dd>
            @{ var dateFormate = Model.DateOfJoining.ToString("dd-MM-yyyy"); }
            @Html.DisplayFor(model => dateFormate)
        </dd>

        <dt>
            @Html.DisplayNameFor(model => model.Department.DeptName)
        </dt>

        <dd>
            @Html.DisplayFor(model => model.Department.DeptName)
        </dd>

    </dl>

        @*<div class="form-actions no-color">
            <input type="submit" value="Delete" class="btn btn-dark" />
        </div>*@
        @Html.ActionLink("Employee", "EmpDelete", new { id = Model.EmpId }, new { @class = "btn btn-danger" })

</div>
Now create the Delete Post Action.
public ActionResult EmpDelete(int id)
        {
            var employee = _context.Employees.SingleOrDefault(x => x.EmpId == id);
            _context.Employees.Remove(employee ?? throw new InvalidOperationException());
            _context.SaveChanges();
            return RedirectToAction("Index");
        }
Run the application and make a try.
Conclusion
We saw how to use the scaffolding and manually write the CRUD code in this section. We also saw how the code works and how the to dispose pattern executes. The purpose of this article was to give you a better understanding of the code and help you get started very shortly with the code.