
In this blog, we are talking about your code coverage file to create an HTML report and send it to the client.
If don’t know about the analysis of test case code coverage. you can watch my previous blog here.
Generate reports
Now that you’re able to collect data from unit test runs, you can generate reports using ReportGenerator. To install the ReportGenerator NuGet package as a .NET global tool, use the dotnet tool install command:
Write command in your project manager console.
dotnet tool install -g dotnet-reportgenerator-globaltool
Run the tool and provide the desired options, given the output *coverage.xml file from the previous test run.
Write this command in your console.
reportgenerator
-reports:"Path\To\TestProject\TestResults\{guid}\coverage.xml"
-targetdir:"coveragereport"
-reporttypes:Html
After running this command, an HTML file represents the generated report. your report HTML file is ‘C:\Users\PCName\coveragereport\index.html’.
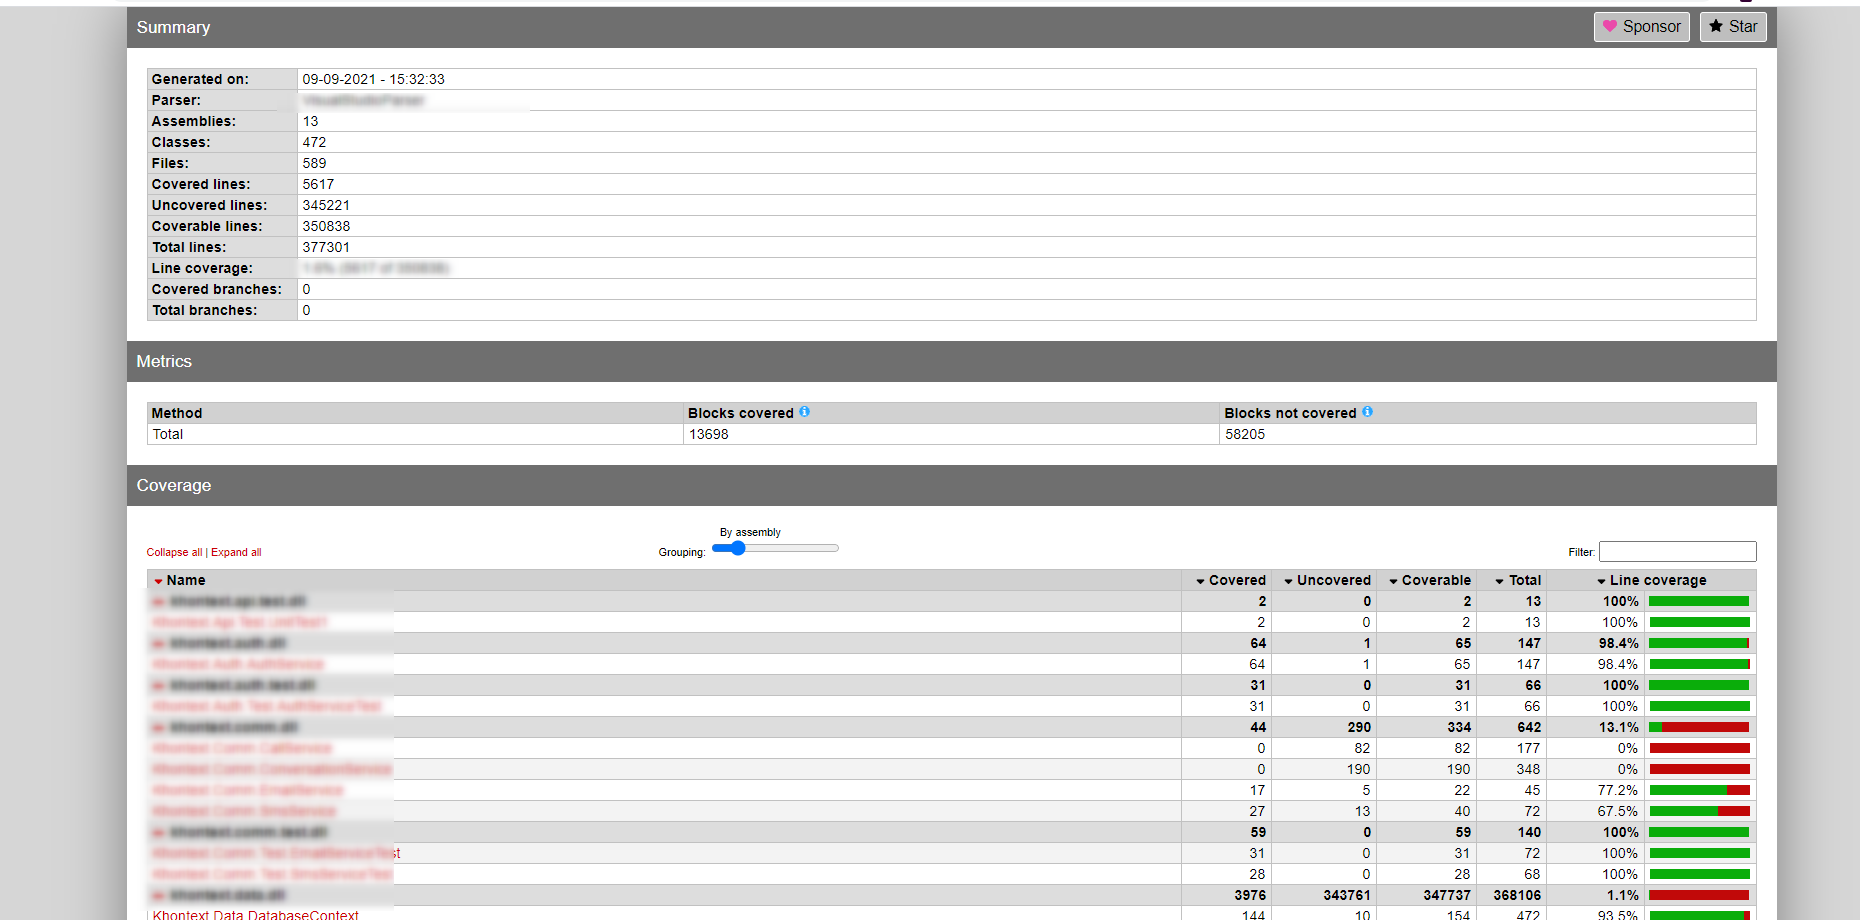
In this generated report, you can watch that where your .cs file code is covered or not and any other information. Now, you can send this file to your project manager and they decide to write more test cases or not base on your percentage.
In this blog, we learn how to create a report for your *.covrage file.
I hope you guys understand how I can do this. Let me know if you face any difficulties.
You can watch my previous blog here.
Happy Coding {;} ????
![]()